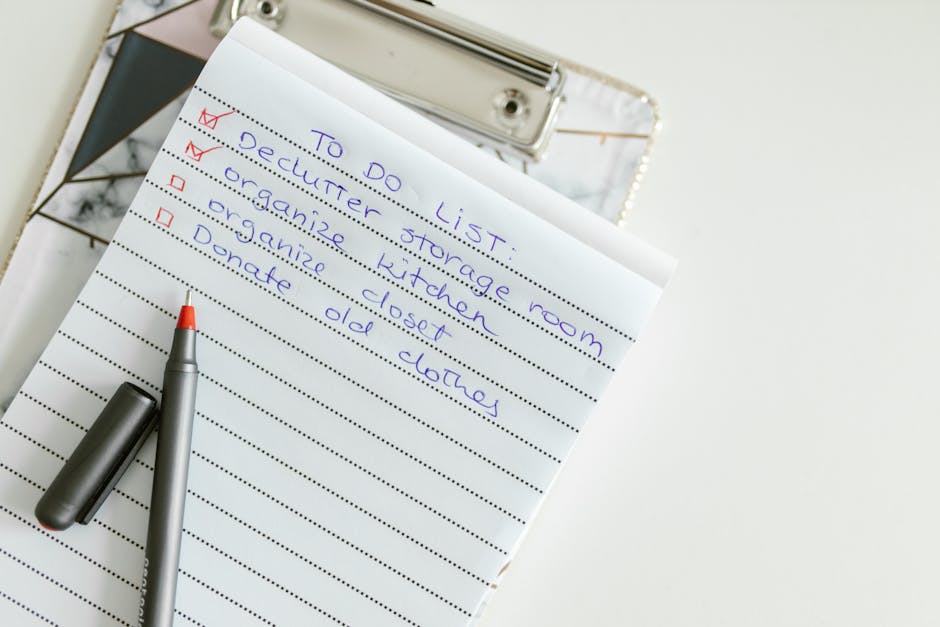
Quick checklist to prepare items for donation before a clearance
When a property needs clearing, donation is often the easiest way to make good use of items you no longer need. The trick is doing it quickly, properly, and without creating extra faff on the day. This quick checklist to prepare items for donation before a clearance is designed for exactly that: a practical, no-nonsense guide to sorting, cleaning, and setting aside usable belongings before the clearance team arrives.
Whether you are clearing a home after a move, dealing with a loft full of old furniture, or getting a flat ready for sale, a little preparation makes a noticeable difference. You will save time, avoid last-minute decisions, and give good items the best chance of being reused. Truth be told, it is one of those small jobs that pays off more than people expect.
If you are also arranging a wider property tidy-up, it can help to think about the clearance in layers: what stays, what is donated, what is recycled, and what is removed. For bigger jobs, services such as house clearance, flat clearance, or loft clearance can fit around your donation plan rather neatly.
Table of Contents
- Why this checklist matters
- How the donation-prep process works
- Key benefits and practical advantages
- Who this is for and when it makes sense
- Step-by-step guidance
- Expert tips for better results
- Common mistakes to avoid
- Tools, resources and recommendations
- Law, compliance, standards and best practice
- Options, methods and comparison table
- Case study or real-world example
- Practical checklist
- Conclusion
- Frequently asked questions
Why Quick checklist to prepare items for donation before a clearance Matters
A clearance can move quickly. Boxes pile up, furniture gets shifted, and suddenly the room looks more like a staging area than a home. That is exactly why a donation checklist matters. It gives you a simple way to separate the useful from the unusable before everything gets mixed together.
Donation-prep is not just about being organised. It helps prevent good items from being accidentally sent for disposal, which is a shame when a clean chair, working lamp, or decent set of shelves could be used again. In the UK, many people also prefer to reduce waste where possible, especially when furniture, appliances, and household items still have life left in them.
There is also a practical side. Donatable items are easier to move when they are grouped, labelled, and cleaned. Clearance crews can work faster when they know what is staying, what is going, and what is meant for donation. Nobody wants the awkward moment of wondering whether the box of crockery was meant for charity or the tip. It happens. More than you'd think.
For larger declutters, especially where bulky items are involved, a bit of planning also supports safer handling. For example, a heavy wardrobe or an old sofa may be better assessed early so you can decide whether it is suitable for donation, needs dismantling, or should go into a separate removal stream such as sofa removal or furniture removal.
Expert summary: If you want a smoother clearance, treat donation as its own mini-project. Sort first, clean second, label third, and only then hand items over. That order alone prevents a lot of confusion.
How Quick checklist to prepare items for donation before a clearance Works
The process is straightforward, but the difference between a rushed job and a smooth one usually comes down to sequence. You are not trying to make every item perfect. You are trying to make suitable items easy to identify, easy to handle, and easy to donate.
In practice, the checklist works in four stages:
- Identify donation-worthy items. Look for goods that are clean, usable, safe, and complete.
- Separate them from general waste. Keep donation items in one area so they do not get mixed in.
- Prepare them for handling. Wipe surfaces, remove loose parts, and group related items together.
- Confirm collection or drop-off details. Make sure the recipient can accept the items you have set aside.
That final stage matters a lot. Charities and donation services can only take items that meet their own conditions, and these can change depending on the item type, condition, and transport method. A nearly new armchair might be fine; a damaged mattress probably will not be. A set of kitchen mugs may be easy to rehome, while chipped plates are another story.
The best results come when you think like the person receiving the donation. Would you want to lift it, clean it, and place it straight into use? If the answer is yes, you are probably on the right track.
For mixed-household clearances, some people also split items into separate piles for donation, reuse, recycling, and disposal. If that is your situation, a broader service such as waste clearance or rubbish removal can sit alongside the donation plan quite neatly.
Key Benefits and Practical Advantages
The obvious benefit is that useful items go on to a second home rather than being treated as waste. But there are a few other advantages worth spelling out, because they add up fast during a clearance.
- Less decision-making on the day. Pre-sorted donations reduce stress when the clearance starts.
- Faster loading and handling. Clear groups of items are easier to move out.
- Better reuse outcomes. Clean, complete goods are more likely to be accepted.
- Less contamination. Donation items stay separate from dirty, broken, or wet goods.
- Better value from the clear-out. You make the most of what you already own.
There is also a small but real emotional benefit. Clearing a property can be tiring, especially if you are dealing with a bereavement, a move, or a long-overdue clean-up. Having a donation plan gives the process a bit of purpose. It feels less like losing things and more like passing them on. That shift matters.
And let's be fair, nobody enjoys standing in a half-empty room at 7am trying to decide whether a toaster is worth saving. A checklist saves you from that nonsense.
| Approach | What happens | Best for | Downside |
|---|---|---|---|
| Donate first | Usable items are cleaned, grouped, and separated before clearance | Homes, flats, and office clearances with reusable goods | Needs a little prep time |
| Sort during clearance | Items are decided on as the clearance progresses | Very small jobs or simple rooms | Slower and more prone to mistakes |
| Clear everything at once | All contents are removed without item-by-item sorting | Urgent or heavily cluttered clearances | Donation opportunities are often missed |
Who This Is For and When It Makes Sense
This checklist is useful for anyone preparing a property or room for clearing, but it is especially helpful if you have a mix of furniture, smaller household items, and a few things that still have decent life in them.
It makes sense if you are:
- moving out and want to reduce what you take with you
- clearing a rental property before handover
- sorting a loft, garage, or spare room full of old belongings
- helping a relative downsize
- preparing a property for sale or refurbishment
- managing an office or business reset
It is also helpful if you are in a busy London household where access, parking, and timing can make a clearance feel more pressured than it should. In a place like London, a small amount of pre-planning often saves a surprising amount of stress on the day.
If the items are mainly business-related, you may want to think in terms of reuse and disposal separately. A workplace clear-out can include desks, chairs, filing cabinets, IT equipment, and the odd old kettle that somehow survives three office moves. For those jobs, office clearance and business waste removal are the more relevant planning categories.
Step-by-Step Guidance
Here is the practical version. Keep it simple. That is usually the fastest way through a donation prep job.
1. Walk through the space room by room
Start with one room, not the whole property. A quick scan helps you spot obvious donation candidates: side tables, bookshelves, lamps, children's items, kitchenware, bedding in good condition, and small appliances that still work.
This is where people often go a bit sideways. They jump from room to room and end up with piles everywhere. Resist that. One room at a time keeps your judgement sharper.
2. Sort into four clear groups
Use four simple categories: donate, keep, recycle, dispose. If you need a fifth pile, it is probably the "decide later" pile, which is fair enough for one or two awkward items, but do not let it become the largest stack in the house.
- Donate: clean, usable, safe items
- Keep: items you still need
- Recycle: materials that can be handled separately
- Dispose: broken, worn-out, or unsuitable items
3. Check condition honestly
This is the part where people sometimes get sentimental. A scratch is not a problem. A broken drawer, missing fixings, strong smells, damp, stains, or visible damage usually are. Be realistic about whether the item would be accepted and whether someone else would genuinely want it.
If it is a sofa, mattress, or upholstered piece, condition matters even more. Items with major damage, infestations, or persistent odours are usually not donation-friendly. For bulky pieces that are still in good condition, services such as furniture collection or bulky waste collection can help you separate the useful from the unsalvageable.
4. Clean and tidy each item
Give items a basic clean: dust, wipe, vacuum, and remove loose marks where possible. You do not need to make them showroom perfect, but they should be presentable. A clean item is easier to accept and quicker to rehome.
For soft furnishings, fresh air helps. Open a window if the weather allows it, let the item breathe, and check for smells before you box anything up. It sounds tiny, but it makes a difference.
5. Remove personal items and loose parts
Empty drawers, pockets, storage compartments, and hidden spaces. You would be amazed what turns up in a bedside cabinet or an old jacket. Keys, letters, chargers, remote controls, spare screws, random batteries... the usual little gremlins.
Also gather any loose parts with the item itself. If a table has removable legs, keep the fixings taped to it or place them in a clearly labelled bag.
6. Label everything clearly
Use simple labels such as "Donate", "Recycle", or "Do Not Move". If multiple people are helping, labelling avoids confusion and accidental re-sorting. In a busy clearance, a clear label can save ten minutes of explanation. Sometimes more.
7. Put donation items in one easy-access place
Make the collection path as smooth as possible. If items are going upstairs or in a tight hallway, that is fine, but keep them grouped together near the exit if you can. The less carrying and reshuffling, the better.
8. Confirm what the recipient can accept
Do a quick final check before the clearance day. Some items look fine to you but may not meet a charity's or reuse organisation's criteria. If in doubt, ask before you load the item into the donate pile. A five-minute check can prevent a wasted journey.
Expert Tips for Better Results
After plenty of real-world clearances, a few habits consistently make the whole process smoother.
- Work in daylight if possible. Natural light makes condition checks easier, especially for stains and marks.
- Keep tools nearby. A cloth, tape, marker pen, bags, and screwdriver are often enough.
- Use the "would I give this to a friend?" test. It is a pretty solid shortcut for donation suitability.
- Decide early on awkward items. The longer you leave a doubtful item, the more likely it is to slow everything down.
- Photograph valuable or unusual items. That helps you remember what was set aside and avoids mix-ups.
One practical tip that often gets overlooked: check access. If the donation items are large or the property has narrow stairs, awkward corners, or no lift, think about moving them before the clearance crew arrives. It keeps the day calmer. You will notice the difference immediately.
If you are donating several pieces of furniture, keeping them together by room can also help. For example, "bedroom set", "living room items", and "kitchenware" is much easier to manage than one mixed pile with no obvious order.
And yes, label the boxes properly. "Bits" is not a label. It never was.
Common Mistakes to Avoid
Most donation-prep mistakes come from rushing. That is understandable. Clearances often happen because life is busy, and busy people are not always in the mood to sort every spoon. But a few common errors are worth avoiding.
- Leaving everything until the last minute. This creates confusion and usually means more gets thrown away.
- Assuming all used items are donation-ready. Condition still matters a great deal.
- Mixing donations with general rubbish. Once that happens, the job gets messy very quickly.
- Forgetting to clean items. A light clean can be the difference between accepted and declined.
- Ignoring safety issues. Broken glass, mould, sharp edges, or unstable furniture should be handled carefully.
- Not checking acceptance rules. Some items need more than a quick wipe and a good intention.
Another classic mistake is overestimating the value of clutter. We all do it now and then. "Oh, that old thing might come in handy" is a phrase that has probably caused more storage problems than any other. If it has sat untouched for years, be honest with yourself.
Finally, do not underestimate the emotional side of clearing. People often keep things because they are tied to memory, not because they are useful. If that is the case, give yourself a minute. Then decide. No need to rush a meaningful choice, but do not let sentiment clog the whole clearance either.
Tools, Resources and Recommendations
You do not need a lot of equipment to prepare items for donation, but a few basics make the work easier and cleaner.
| Tool or item | Why it helps | Best use |
|---|---|---|
| Marker pen and labels | Keeps donation, recycle, and disposal piles clear | Boxes, bags, furniture tags |
| Microfibre cloths | Quick cleaning with minimal fuss | Furniture, shelves, small appliances |
| Strong bags or boxes | Helps group smaller items safely | Books, kitchenware, toys, linens |
| Basic screwdriver | Useful for removing loose parts or dismantling items | Flat-pack furniture, bed frames, shelving |
| Tape | Keeps fixings and small parts together | Tables, chairs, shelving units |
For larger projects, it can also help to use a simple moving blanket or sheet to protect the floor while you sort. Not essential, but it keeps things tidy. If you are dealing with heavier goods, think about whether the item should be handled as part of bulk waste collection or whether it is better suited to reuse first.
On the planning side, a quote page such as pricing and quotes can be helpful when you want to understand the likely structure of a clearance visit. That said, the best quote is always the one built on a clear picture of what needs moving, what is being donated, and what remains for removal.
Law, Compliance, Standards, or Best Practice
For most households, donation prep is guided more by best practice than by complicated rules. Still, a few sensible principles are worth following.
First, do not donate anything unsafe, damaged beyond reasonable use, contaminated, or likely to cause harm in transit. That is common sense, but it matters. Second, if you are dealing with electrical items, only pass on things that are in working order and appear safe to reuse. Third, be careful with any item that may contain personal data or hidden belongings, such as paperwork, storage devices, or office equipment.
If you are clearing from a business or rented property, keep your records tidy. It is wise to know what was donated, what was recycled, and what was removed. For office and commercial clearances, that helps with internal accountability and avoids disputes later on.
There is also a strong environmental angle. Reuse first, recycle second, dispose last. That order is widely accepted as best practice because it keeps usable items in circulation and reduces unnecessary waste. If you care about that side of the job, the company's recycling and sustainability information is worth a look as part of your planning.
Finally, make sure you understand any collection or access requirements before the clearance day. Some buildings, especially in central or busy London areas, have access rules, loading restrictions, or time windows that affect what can happen and when. A little checking now is easier than a problem on the morning itself.
Options, Methods, or Comparison Table
There is more than one way to handle donation items before a clearance. Which approach works best depends on how much time you have and how mixed the property contents are.
| Method | Pros | Cons | Best for |
|---|---|---|---|
| Self-sort and hand over | Most control, very clear separation | Takes your time and effort | Smaller homes, prepared households |
| Clearance team sorts with you | Fast and flexible | More decisions on the day | Mixed rooms, limited prep time |
| Donate only selected categories | Simple and predictable | Some reusable items may be missed | Specific items like furniture or kitchenware |
| Full property clearance with donation triage | Efficient for large jobs | Needs good communication | House clearances, estate clearances, busy move-outs |
For many people, the sweet spot is a hybrid approach: you pre-sort the obvious donation items, then let the clearance team handle the rest. That keeps the job moving without making you spend a whole weekend second-guessing old shelving.
Case Study or Real-World Example
A typical example: a family preparing a two-bedroom flat for sale in west London. They had a mix of decent kitchenware, a sturdy coffee table, several bookshelves, and a sofa that still looked good but needed checking. The rest was a jumble of broken items, paperwork, and storage boxes.
They spent about an hour sorting the flat before the clearance date. Donation items were wiped down, labelled, and moved to one corner near the entrance. The coffee table was cleaned, the bookshelves had loose fittings bagged and taped on, and the kitchenware was packed in boxes with simple labels. The sofa was assessed separately and, after checking condition and access, treated as a bulky item rather than a donation item.
On the day, the process felt much calmer. The crew could see instantly what was being donated and what was going for removal. No guesswork, no awkward back-and-forth, no scrambling to find the missing screws from a shelf at the last minute. That sort of clarity is boring in the best way possible.
In practical terms, the family saved time and avoided mixing reusable things with waste. More importantly, the items in good condition had a better chance of being put back into use rather than lost in the general clear-out.
Practical Checklist
Use this simple checklist the day before the clearance, or earlier if you can.
- Walk through each room and identify items suitable for donation.
- Separate donation items from keep, recycle, and disposal piles.
- Check each item for cleanliness, safety, and completeness.
- Wipe surfaces, vacuum soft items, and remove visible dust or marks.
- Empty drawers, pockets, and storage compartments.
- Remove loose parts and place fixings in labelled bags.
- Label boxes and larger items clearly.
- Keep donation items near an easy access point where possible.
- Confirm the recipient can accept the items you have sorted.
- Set aside any questionable items for a final decision, not a forever decision.
Quick takeaway: If an item is clean, safe, complete, and easy to move, it is probably donation-ready. If it is not, be honest and move on. That simple filter solves a lot.
Get a free quote today and see how much you can save.
Conclusion
A good donation plan takes very little time, but it can transform a clearance from chaotic to manageable. With a clear checklist, you protect reusable items, reduce waste, and make the whole process easier for everyone involved. You also avoid the classic last-minute panic that seems to appear just when the van is due. Funny how that always happens.
If you keep the process simple - sort, clean, label, confirm - you will usually do just fine. And if the clearance is bigger than expected, or the property has a lot of bulky furniture, using a structured approach alongside a professional clearance service can save a great deal of stress. Small steps. Clear labels. One room at a time. It really does help.
Take your time where it matters, stay practical, and let the useful things keep their next life. That is the part that feels good, even at the end of a long clear-out.
Frequently Asked Questions
What should I prepare before donating items during a clearance?
Start by sorting items into donation, keep, recycle, and dispose piles. Then clean the donation items, remove personal belongings, check for damage, and label them clearly so they are easy to identify on the day.
Can I donate furniture if it has a few marks?
Usually yes, if the marks are minor and the item is otherwise clean, safe, and usable. Light wear is often acceptable, but broken parts, strong smells, or structural damage may make it unsuitable.
Should I clean items before donating them?
Yes, a basic clean is one of the best things you can do. Wiping surfaces, dusting shelves, and washing visible dirt off items makes them easier to accept and rehome.
What items are usually not suitable for donation?
Broken, heavily stained, unsafe, mouldy, or pest-affected items are usually not suitable. Damaged mattresses, unsafe electricals, and contaminated soft furnishings are common examples.
How far in advance should I prepare donation items before a clearance?
If possible, start one to three days before the clearance, especially for larger homes. Even a short prep session the evening before can make the day much smoother.
Do I need to label donation boxes?
Yes, labels save time and prevent confusion. A simple "Donate" label is usually enough, though it helps to note the room or item type as well.
What is the best way to organise donation items in a house clearance?
Keep donation items together in one accessible area and separate them from everything else. Grouping by room or category also helps when there are several items to move.
Can bulky items like sofas or mattresses be donated?
Sometimes, but only if they meet the recipient's condition criteria. Sofas and mattresses often face stricter acceptance rules because of hygiene, safety, and handling concerns.
What if I am not sure whether an item should be donated or disposed of?
If you are unsure, use a simple test: is it clean, safe, complete, and likely to be wanted by someone else? If the answer is no, it probably belongs in recycle or disposal instead.
Is it better to donate before or after the clearance team arrives?
Before, if you can. Pre-sorting helps avoid confusion and means the clearance team can work more efficiently. If time is tight, a mixed approach can still work as long as the donation items are clearly marked.
What should I do with items that have all the parts missing?
Items missing key parts are often better treated as waste or recycling rather than donation. For example, flat-pack furniture without fixings or a lamp without a safe plug may not be suitable.
Can I use the same checklist for a flat clearance and a house clearance?
Yes, the basics are the same. The main difference is scale: a flat clearance may need more attention to access and space, while a house clearance may involve more rooms, furniture, and storage areas.